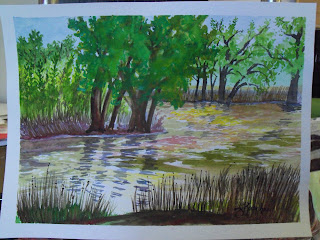
This is what I've been up to most recently. Not all of my current work is here, but a few looks at what is going on at home and in the studio.
Tuesday, July 19, 2011
Recent Watercolors
Here are some new watercolors. (Pardon the sideways image. I can't figure out how to delete it or edit its' orientation).
Monday, June 6, 2011
2010 Fiber Work
Here are a few of my fiber works done last year. They are predominately silk painting.
New Paintings
I've been busy working on some paintings for juried show applications. I've been working in both acrylic and watercolor. I'm still sewing like crazy. I've been working on MFA show works, commissioned peices and a few baby blankets to welcome the new arrivals in my world. It's been a busy spring so far!
Monday, April 11, 2011
How to prepare a cathedral square
1. Lightly spray starch on fabric square.
2. Lay 6.5"x6.5" template down on fabric square and iron 4 sides over template.
3. Remove template.
4. Fold fiber square in half and iron.
 5. Fold in half again and iron.
6. Unfold so that you can see the creases in the fabric.
 7. Use the creases in the fabric as guidlines and bring down each corner to the center, one at a time, ironing each as you go.

You have a finished square! ( You don't need the pins, they are just there to show you what it should look like in the end)
Wednesday, March 2, 2011
Here goes!


After several requests I have actually managed to upload some photos of at least one of my finished pieces. This quilt is the first quilt I have ever attempted and this is the art side of it. There is a photo of the traditional side before I pieced it, but I will have to upload photos of that side finished at another time. This quilt is also my first attempt at art quilting. I created it for my sister and her husband in commemoration of their wedding. The imagery used in the art side of the quilt makes reference to various moments in their courtship. Though you can't see it well in the photos, the actual "quilting" part of the quilt (the stitches that bring the back, front and batting together) is actually an image of my sister and her hubby on the beach in Hawaii at their wedding.
Subscribe to:
Comments (Atom)


 Gabriel Quilt, non-traditional side.


